Guilt-free Yet Irresistible Thanksgiving Recipes To Try This Year
Over the years, I have shared some of my favorite Thanksgiving recipes — healthy, yet utterly satisfying takes on traditional Thanksgiving day fare that dare I say, taste better than their original counterparts! Here is the ultimate vegan and gluten-free Thanksgiving recipe roundup that you may want to try this year, no matter your guests’ dietary preferences.
Arugula and Persimmon Salad

When I was a kid and my mom gave me a persimmon to try for the very first time, I was surprised it didn’t taste like a tomato, as persimmons very much resemble tomatoes. As I observed closely, there were specks of brown in the fruit—almost as if God had sprinkled the fruit with cinnamon and it was naturally occurring, embedded into the fruit. Hence, my initial childhood conclusion that cinnamon derived from per”cinnamon”s—hello, it’s in the name, duh! As I grew perplexed and analyzed that it was probably a silly idea since we had cinnamon sticks to stir hot apple ciders and Mexican hot chocolates with, and we actually had to ground cinnamon sticks to add into recipes I thought, “what a coincidence” and how beautiful of God to just sprinkle fruit with cinnamon and make a star shape design for us to see (when slicing the fruit horizontally). I just left it at that—a coincidence and viewed them as two separate things. Besides, how in the world would one be able to extract specks of cinnamon from the persimmons. Oh silly, silly me!
Fast forward 30 years when I had my twin nephews try persimmons for the first time, I told them the story I just shared with you, and they asked where cinnamon came from. Since I never looked it up, I turned to one of my favorite instructional learning tools, YouTube , and we learned that cinnamon is made from the barks of cinnamon trees, rolled up by people in a forest (well at least the people in a forest in the video we watched). It’s a very timely process and I could not believe how much effort it takes to make and how cheap and available it is to us. I will never look at cinnamon and persimmons the same again, especially knowing now that they are mutually exclusive.
Moving on, although persimmons and cinnamon are both in season right now, this salad only contains persimmons. It’s a family and friend favorite this time of year. Make it for the holidays, for your parents when they come to visit, for a date, or treat yourself. It is super super simple, and contains the following ingredients: arugula, ripened and crisp persimmons, dates, shallots, marcona almonds, an easy soft cashew cheese, saba, and sea salt and pepper.
Servings: 4-6
Prep Time: 20 minutes (not counting the time it takes to make the cheese. With cheese, one day.)
Ingredients
2-3 bags pre-washed baby arugula
4 crunchy fuyu persimoons, peeled, stem removed, and sliced into 8ths
1/2 cup marcona almonds
1/2 shallot, sliced very thin
3 dates, sliced very thin
handful crumbled goat cheese (you can use this vegan goat cheese recipe sans the cranberry and dill, and when you blend it, add 3 Tbsp agar agar flakes)
2 super ripe and juicy persimmons, stem and peel removed
saba (aged balsamic), as needed
sea salt, as needed
freshly ground black pepper, as needed
Directions
1. Spread the arugula onto a serving platter.
2. Season with a dash or two of sea salt and pepper.
3. Tuck into the leaves bits of shallot, dates, marcona almonds, persimmon wedges.
4. Sprinkle on vegan goat cheese.
5. In a bowl, place the super ripe and juicy persimmon flesh. Stir it up a bit as if you are going to use it as a sauce. Using a spoon, in a circular motion, add the persimmon flesh as you would a dressing.
6. Finish off with a drizzle of saba.
Holiday “Meat”loaf

Growing up, my Auntie Delia would make her famous meatloaf for special occasions. I loved it and would always slather my slice of meatloaf with double the ketchup. It was such a special treat. Fast forward to today, during the holidays I usually cannot partake in our family’s usual feast, so instead I make a veganized version of my Auntie Delia’s meatloaf to take with me, along with other sides. Surprisingly, it tastes and looks just like Auntie Delia’s meatloaf. I shock quite a few people when I tell them it is vegan.
Even meat-eaters think this meatloaf is delicious and that it contains animal meat. Boy, do I fool them!
I make a very high protein faux meat to incorporate into this loaf consisting of quinoa, mushrooms, and walnuts. When blended together in a food processor, it resembles ground meat. To the faux meat, I add most of the same ingredients that Auntie adds to her meatloaf, only I add parsley to the mix to give it some freshness. I don’t add hotdogs in the center of the loaf (since all the vegan hotdogs I’ve seen at the store are made from soy). I add cayenne pepper, flax “eggs”, a vegan Worcestershire sauce, my homemade ketchup, and, instead of soy sauce, coconut aminos. Although Auntie Delia is known to make low-fat, “healthy” foods, I’d say this beats her turkey meatloaf when you compare overall nutrition.
This is my holiday version of the meatloaf. My original meatloaf recipe is in the My Eclectic Kitchen App, which is actually the version I make year-round!
Servings: 4-6
Time: 1 hour 50 minutes
Diet: V, GF, GFV, DF, SF, SRF
Ingredients
½ cup quinoa, uncooked
1 cup filtered water
2 Tbsp flax meal
6 Tbsp filtered water
2 cups crimini mushrooms (or substitute porcini mushrooms), roughly chopped
1 cup walnuts, chopped
½ onion, chopped
1 celery stalk, finely chopped
1 small carrot, peeled and finely chopped
¼ cup dried cranberries, roughly chopped
1 Tbsp parsley, finely chopped
½ tsp rosemary, finely chopped
½ tsp sage, finely chopped
½ tsp thyme, finely chopped
¼ cup almond milk
1 cup gluten-free rolled oats
¼ tsp cayenne pepper
¼ tsp freshly ground black pepper
2 tsp garlic powder
1 Tbsp coconut aminos (can substitute tamari)
1 Tbsp vegan Worcestershire sauce
1/8 tsp sea saltG
Cranberry Glaze
Or
Traditional Meatloaf Glaze:
3 Tbsp ketchup
1 1/2 Tbsp vegan Worcestershire sauce
1/8 tsp garlic powder
Directions
1. Rinse and drain quinoa. Place the quinoa and 1 cup of water in a small saucepot and cover. Cook the quinoa over medium heat. Once it has reached a boil, reduce heat to low, and simmer. The quinoa should be cooked in about 15 minutes, when all the water is absorbed. Keep an eye on it so it doesn’t burn. Set aside to cool.
2. Preheat the oven to 325 degrees F.
3. Line a loaf pan with parchment paper. First, cut two pieces of parchment paper– one piece for the length of the loaf pan, from rim-to-rim, and one piece for the width of the loaf pan, rim-to-rim. Spray the loaf pan then place one parchment piece down. Spray the parchment again and lay the other piece of parchment over crosswise, like an x. Spray the parchment again. See here for a demo: http://www.youtube.com/watch?v=UJUhAYSy-U8
4. Prepare the flax egg. In a small bowl, combine the flax meal with 6 Tbsp of water, mix and set aside to thicken.
5. Prepare the faux “meat”. Measure out ¾ cup cooked quinoa (store leftover quinoa in the refrigerator to eat later). Place the quinoa in a food processor with the mushrooms and walnuts, and process until it comes together and resembles the same texture as ground meat.
6. Place the faux “meat” in a large mixing bowl and add the remaining ingredients to the bowl, including the flax egg. With clean hands, toss all the ingredients until fully combined.
7. Pour the “meat”loaf mixture into the loaf pan and pat down well, spreading evenly. Flatten the top.
8. Place the loaf pan in the center of the oven for about 1 1/2 hours.
9. Make the glaze. Either a Cranberry Glaze or the Traditional Meatloaf Glaze by combining ketchup, vegan Worcestershire sauce, garlic powder, and stirring together with a spoon.
10. 10 minutes prior to removing the loaf from the oven, brush the top of the meatloaf with the glaze, spreading it evenly to coat. If you use the Cranberry Glaze, use only a little over ¼ cup of it to spread. Reserve the rest of the Cranberry Glaze to serve on the side.
11. Allow the loaf to cool for about 10 minutes prior to cutting.
12. Serve with a side of steamed broccoli or green beans and/or mashed potatoes.
Note: This can be made in advance and refrigerated overnight. To reheat, preheat the oven to 300 degrees F and heat for about 25 minutes.
Herbed Biscuits & Mushroom Gravy
- 4 c. Trader Joes gluten-Free flour blend
- 3 tsp. xanthan gum
- 4 tsp. baking powder
- 2 tsp. baking soda
- 4 tsp. unrefined granulated sweetener/raw sugar
- 1 tsp. sea salt
- ½ cup + 2 Tbsp. refined coconut oil*, room temperature
- 2 c. unsweetened plain almond milk
- 2 Tbsp. apple cider vinegar
- 2 tablespoon dried basil
- 2 teaspoon dried dill
- Wide Mouth Mason Jar*
Instructions
- In a medium bowl, whisk together the flour, xanthan gum, baking soda and powder, sugar and sea salt.
- With a pastry blender of the back of a fork, cut in the coconut oil into the dry mixture until it becomes like a coarse meal.
- Stir in the almond milk and vinegar with a wooden spoon until just combined.
- Set in fridge 10 mins
- Preheat your oven to 425 degrees. Line a baking sheet with a piece of parchment paper.
- Remove from fridge and dump the dough onto a counter lined with parchment paper. Gently work it into a ball with lightly floured hands (dough may be slightly sticky).
- Gently press dough to be 1″ high and 8″ in diameter. Cut out biscuits using a wide mouth mason jar*. Place biscuits on the baking sheet and continue until all dough is used.
- Bake for 12-14 minutes or until lightly browned on top. Serve immediately with gravy.
Notes
Wide Mouth Mason Jar: 3 1/4″ mouth 10″ circumference
The coconut oil must be refined in order to avoid the coconut flavor.
Mushroom Gravy
- 2 Tbsp vegetable broth, + more as needed (for cooking)
- 2 cloves garlic, minced
- 1/2 cup white or yellow onion, diced
- 1/3 carrot, peeled and diced
- 4 oz thinly sliced mushrooms
- 1/4 tsp fresh sage
- ½ tsp fresh thyme, chopped
- 1/4 teaspoon minced fresh rosemary
- 2 tablespoons Trader Joes gluten-Free flour blend
- 1/2 cup vegetable broth
- 3/4 – 1 cup unsweetened plain almond milk*
- 2 teaspoons coconut aminos
- 1/8–1/4 teaspoon salt, to taste
- Fresh black pepper, to taste
Instructions
- Add a bit of water or vegetable broth to a large saucepan over medium heat. Add in the garlic, onion and carrot, and cook until the onions are translucent. Add in the mushrooms, sage thyme, rosemary, and cook until mushrooms soften, about 3 mins.
- Add flour and coat, mix well and cook for 1 minute.
- Slowly add in liquids, 1/2 cup at a time.
- Cook until thickened, stirring frequently, on low. Add salt and pepper, taste, then adjust seasonings as needed.
- Keep on low until you’re ready to serve, adding almond milk as needed.
Notes
Start with 3/4 and add more as needed
Fig and Frangipane Tart

Preheat oven to 350 degrees
Essential tool: 9 inch tart pan with removable bottom
Ingredients
18-20 figs or 1.5 – 2 pounds of figs, quartered length-wise
Tart Dough
1/4 cup ice cold filtered water
1 cup plus 2 tbsp oat flour (gluten-free oat flour)
1/4 tsp fine sea salt (I use Himalayan)
6 tbsp (3 oz.) coconut oil (chilled and chunked into tsp pieces. doesn’t have to be perfect)
Frangipane Filling
3 tbsp coconut oil
1/3 cup coconut palm sugar
1/2 cup plus 2 tbsp almond meal
1 heaping tbsp arrowroot
pinch sea salt
1/8 tsp cinnamon
1/3 cup almond milk
1.5 tsp vanilla extract (no alcohol)
1/2 tsp almond extract
Directions
Tart Dough
1. Place oat flour, salt and cold chunks of coconut oil into food processor. Pulse until coconut oil pieces are pea-sized.
2. While continuously pulsing the oat flour, pour the cold water in (make sure no ice falls in. I just place the measuring cup in the freezer to make it ice cold). Pulse until it almost comes together. (about 3-4 times)
3. Lay out about 13 inches of plastic wrap on the counter (if you don’t have this, use parchment) and pour the dough and flour pieces onto the plastic. Form the dough into a disc shape, about 6 inches in diameter and wrap the sides, leaving about an inch of space when folding. Once it’s wrapped, use a rolling pin to roll out about an inch more. Roll the dough from the center out. Place in the refrigerator.
4. Make the tart filling. Then spray non-stick cooking spray inside, all over the sides of the tart pan. Place tart pan on a half sheet tray, lined with parchment paper or a silpat (silicone baking mat).
5. When you’re done with the tart filling, remove from the dough from the refrigerator. If it’s too hard, you will need to wait until it is soft enough to roll out without cracking. But you don’t want it too soft that it melts. You will have to work quickly.
6. Open the plastic wrap, leaving the plastic on the bottom of the dough and either grab another piece of plastic wrap or parchment paper to place on top of the dough (or manipulate the plastic wrap you have to help you) and roll out the the dough to about an 11-inch in diameter circle. The crust should still be a bit cold at this point so it’s easier to handle. Bring the sheet tray near you with the sprayed tart pan, and holding the dough circle from the bottom (or wrapping the dough on top of a rolling pin with the plastic on top), quickly flip the dough into the tart pan, then carefully peel off the plastic. Push the dough into the tart pan and onto the sides. If the dough breaks, no worries, just press it together. If one side needs more dough, take some dough from a thicker side and press it into an area that needs more dough. Do what you have to do to get what you see below. If it starts melting and difficult to handle, put it back in the refrigerator to harden up a bit. Again, make your dough look like below, with no wholes.
7. Place the tart shell back in the refrigerator or even freezer so it sets a bit. Go to tart filling, step 3.
Tart Filling
1. In a medium mixing bowl, add the coconut palm sugar, salt, cinnamon and wet ingredients: coconut oil, almond milk, vanilla and almond extracts. Stir to combine and to dissolve the salt and sugar. The sugar won’t completely dissolve and that’s fine. Add the almond meal and arrowroot and stir well to combine. Set aside.
2. Go back up to step 5 of the tart dough directions.
3. After the tart shell is set (hardened), take it out of the refrigerator, give the tart filling one or two last stirs, then fill the tart shell with the filling, spreading it evenly to cover the bottom of the tart crust. Place back in the refrigerator and cut up the figs in the meantime. Cut them length-wise, first in half, then cut the halves in half to get quarters.
Assembling the the figs in the tart
Once the frangipane has been in the refrigerator for about 5 minutes, place the figs, pointy (stem) side up, round side down, pink side exposed, starting from the outside of the circle, just onto the frangipane, along the crust. The frangipane should hold it in place (but don’t push it through and into the frangipane. Just lay it gently in place). Let the figs touch shoulder to shoulder. For the second layer inward, stagger and repeat. Repeat the hird layer and so on until you get to the center.

Once you’ve made your fig flower, take a photo because it’ll look awesome raw! Then place the sheet tray with the tart shell on it in the center of the preheated 350 degree F oven for about 45-50 minutes or until the crust gets golden-ish, or like my photos. Since there isn’t butter or cream in the crust, you won’t achieve a true golden color.
It may bubble over a smidge, and when you take it out of the oven, it will look wet. Be careful not to spill the liquid. Don’t be alarmed. It will set once it cools. Once it is almost cool, carefully remove the tart shell tart pan touching the sides/crust, leaving only the base intact. (Bottom/base of the tart pan will be intact until you serve the last piece.) Using 2 spatulas, I placed the tart on a cake stand. You can just put it on a flat large plate to save space and to avoid accidents, if you’d like. Carefully place the tart in the refrigerator for at least 3 hours before serving. After 3 hours, the liquid will be set.
I had this with coconut whip for the first time and it was delish! But I also had it without the coconut whip and it was still luxurious. Peyman has his hang ups with figs so I had to trick him into tasting a piece. He said it was, “mmm…Good!”
I hope you enjoy this as much as we did! Please let me know how yours turns out!
Garlicky Cauliflower Puree

Photo Credit: Jasmine Briones
This recipe is a great healthy vegan take on garlic mashed potatoes. Garlicky Cauliflower Puree dressed with Mushroom Gravy (recipe above) is a wonderful side dish for any holiday meal. It is so easy to make and can be enjoyed year-round!
When trying to eliminate or reduce carbs like rice or potatoes from your diet, using cauliflower is a perfect substitute. I use cauliflower to make cauliflower “rice”, a couscous substitute, and to make cauliflower puree or mash.
This garlicky cauliflower puree feels and tastes very similar to mashed potatoes, but is so much better for you. This recipe contains no cream, butter, fake butter, or oil. Roasted garlic gives this a lovely full flavor. I enjoy my garlicky cauliflower puree with “Meat”loaf and Mushroom Gravy.
What are some benefits of eating cauliflower? This cruciferous vegetable is naturally high in both fiber and B-vitamins. One cup of cooked cauliflower equals 2.28 grams of protein. It also contains antioxidants and phytonutrients that can protect against cancer, fiber that helps with satiety, weight loss and a healthy digestive tract, choline that is essential for learning and memory, omega-3 fatty acids that reduce inflammation, as well as many other important nutrients.
I hope you enjoy this recipe during the holidays and throughout the year!
Servings: 6-8
Time: 40 minutes
Ingredients
1 large head of garlic
1 head of cauliflower
2+ cups vegetable stock
½ tsp sea salt
Garnish
¼ bunch chives
Directions
1. Preheat the oven to 400 degrees F.
2. Slice off the top of a large head of garlic to expose the cloves inside. Place the head of garlic on a piece of foil, cut side up. Drizzle about 2-3 Tbsp vegetable stock and wrap it tightly in the foil. Roast until cloves are lightly browned and tender, about 30-35 minutes.
3. Clean the cauliflower, removing the outer leaves and base. In a medium saucepot, add 2 cups of vegetable stock, ¼ tsp sea salt, and the cauliflower. Set the pot over medium heat. Bring it to a boil, then down to a simmer. Cover and cook until tender, about 20-25 minutes.
4. Once the garlic has roasted, let it rest for at least 5 minutes. It will be hot. Carefully open the foil, pick up the bulb, and push the garlic cloves from the skin (peel), starting from the bottom up, pushing the roasted cloves out and into a blender.
5. Strain the cauliflower and reserve the vegetable stock. Transfer the cauliflower to the blender. Add the remaining ¼ tsp sea salt. Add ½ of the reserved liquid. Blend and adjust the consistency. If the cauliflower is too thick, add more stock. If it’s too thin, try cooking the liquid out on the stovetop.
6. Season to taste and top with chopped chives.
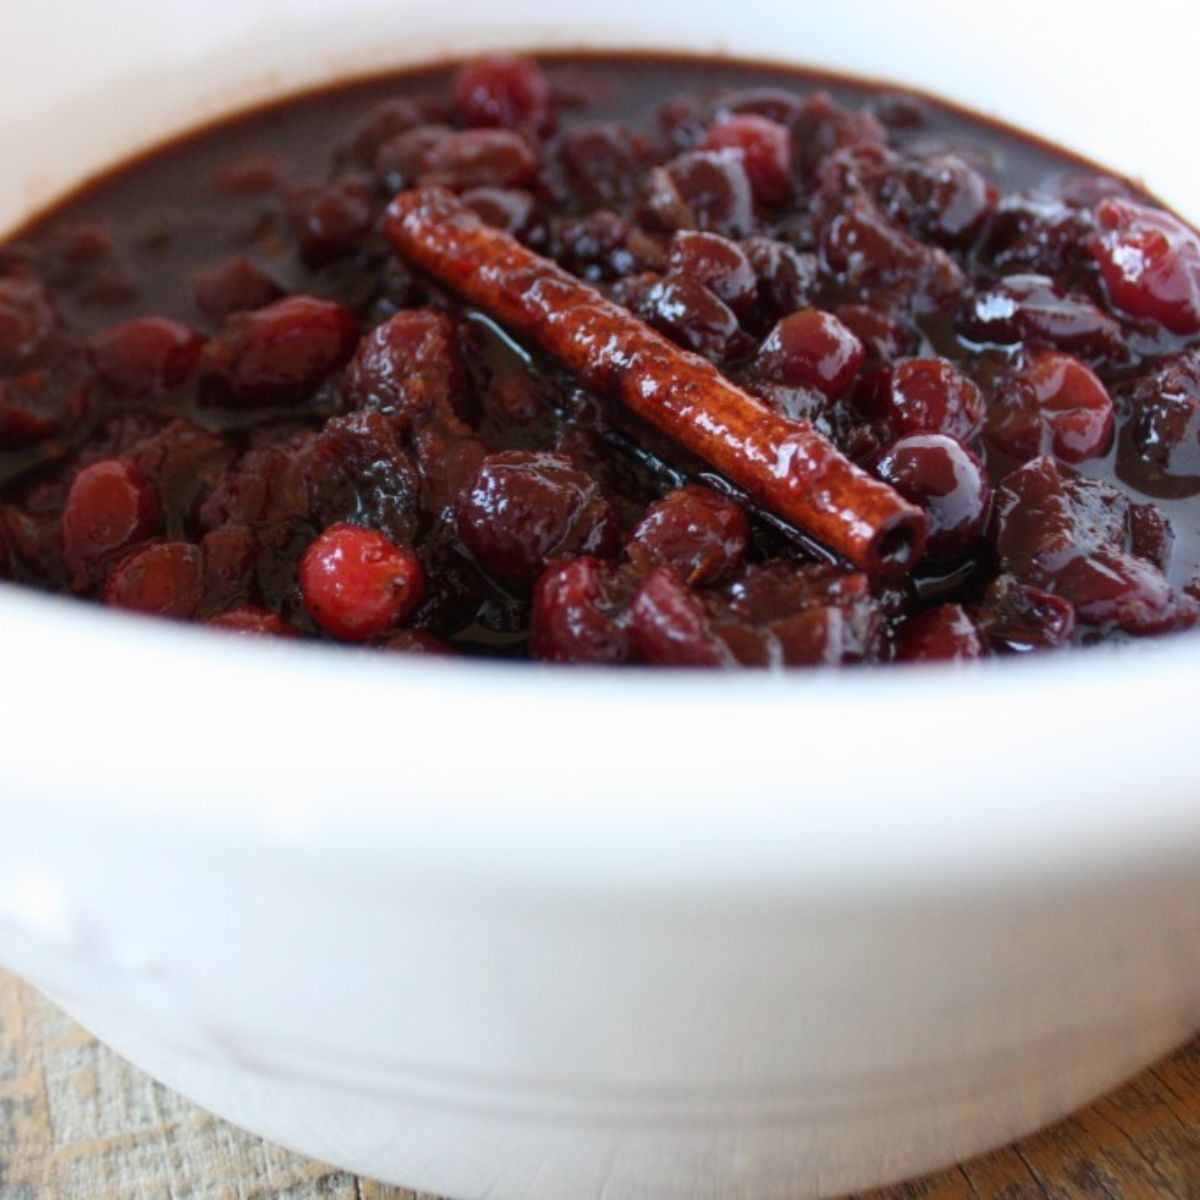
Cranberry Sauce

Time: about 30 minutes
Ingredients
1 1/2 pound fresh cranberries, washed and dried
2 cups coconut palm sugar
1/2 cup filtered water
1/2 + 1/8 tsp ground cinnamon
3/4 tsp ground allspice
1/4 + 1/8 tsp ground nutmeg
1 small orange, zested and juiced
Directions
1. Wash and dry cranberries.
2. In a medium saucepot, combine the coconut sugar, filtered water and cranberries. Mix.
3. Over medium heat, bring to a boil, then reduce to a simmer. Add the cinnamon, allspice and nutmeg. Stir to combine and simmer for 7 minutes. Some cranberries will remain whole and some will burst.
4. Add zest and juice to taste. Cool and chill to thicken. As the sauce chills, the natural pectins in the fruit will thicken the sauce.
5. Serve chilled and enjoy! This can be made a day in advance.
Candied Yams (or Sweet Potatoes)

Photo Credit: Jasmine Briones
Servings: 6-8
Time: 1 hour
Diet: V, GF, GFV, DF, SF, SRF, NF
Ingredients
4 cups sweet potatoes or yams, peeled and cut into 2-inch cubes
3/4 cup orange juice, fresh
1 ½ cup filtered water
1 cup medjool dates, pitted
¼ tsp cinnamon, ground
1 tsp vanilla extract
2 Tbsp coconut oil (or grapeseed oil)
Directions
Note: Best made a day or a few hours in advance.
1. Preheat the oven to 400 degrees F.
2. Wash, peel, and cut the sweet potatoes or yams. Place them in an 8”x8” or 9”x9” casserole dish, and place the casserole dish in the center of a baking sheet, lined with parchment paper or a silicon mat.
3. In a blender, add the remaining ingredients: orange juice, filtered water, pitted medjool dates, cinnamon, vanilla extract, and oil. Blend well, until the dates are pulverized. If the mixture is a little chunky, that’s fine.
4. Pour the wet mixture over the sweet potatoes or yams and toss to coat. Place in the oven for about 45-55 minutes, tossing every 15 minutes, and cook until the sweet potatoes or yams are fork tender.
5. If made a day in advance, remove from the refrigerator and place in a 350 degree F oven for about 20 minutes.
Raw Stuffing

I absolutely love Thanksgiving stuffing. For as long as I can remember, my family enjoyed Stove Top stuffing for the holidays. For my first holiday season as a vegan, my holiday meals didn’t feel complete without my beloved stuffing. Thankfully, I discovered raw vegan stuffing through Kimberly Snyder, my health and nutrition guru. I adapted her recipe by changing up and adding a few other herbs and spices. I also made my version lower in fat by reducing the amount of oil and adding a vegetable stock (ok, that’s not fully raw) or filtered water (this is raw!) instead!
After reading the Food Babe’s article highlighting what toxins may be hiding in typical American Thanksgiving feasts, I was thoroughly disgusted. I actually don’t miss Stove Top stuffing one bit! Why would I subject my body (and the bodies of my loved ones) to toxic food when I can make non-gmo, nutrient-dense, better-for-you versions myself? And they’re so easy to make, too!
I am so happy that I can now enjoy my raw stuffing and share it with everyone! This recipe isn’t just for the holiday season, it can be enjoyed year-round as a side dish, added to a salad, or stuffed into lettuce wraps!
One bite of this stuffing and you will be in disbelief at how much this tastes just like Stove Top stuffing! It truly is amazing how good this is!!
Servings: 4-6
Time: 20 minutes
Diet: V, GF, SF, SRF, R
Ingredients
½ cup almonds, soaked overnight and rinsed well
1 1/2 cup pecans
1 cup carrot, chopped into ¼” pieces
1 cup celery, chopped into ¼” pieces
1/3 cup sweet onion, chopped into ¼” pieces
¾ cup crimini mushrooms, chopped
¼ tsp turmeric, ground
2 tsp parsley, chopped
1 ½ tsp rosemary, chopped
1 tsp thyme, chopped
½ tsp oregano
1 tsp sage
½ tsp freshly ground black pepper
1 Tbsp cold-pressed olive oil
½ tsp coconut vinegar (or apple cider vinegar)
3-4 Tbsp vegetable stock (or filtered water)
1/8 tsp sea salt
Directions
1. Process the soaked almonds and pecans in the food processor until they are chunky and not too fine.
2. Pour the nuts into a large bowl, then add the remaining ingredients, and mix well.
3. Cover and refrigerate until serving.
I would love to hear what your Thanksgiving tried and true favorites are, as well as any requests for making old favorites in a vegan, gluten-free, and guilt-free way! If you try out any of these recipes, tag me on Instagram @YvonnesVeganKitchen
Leave a comment
Comments will be approved before showing up.
Also in Blog


